Attitude.....in progress

"Attitude" is a fabric and paper art journal that I have been working on and it's almost complete. This is my first attempt at making a book where the base is paper and each page has a fabric piece sewn onto it......it's a hot mess! The cover is made from an upholstery sample with layers of fabric scraps. The fleur de lis is a metal piece that I bought at an architectural salvage store in Louisville, Kentucky. I used a Tim Holtz gadget to punch holes into the metal so I could sew it onto the cover. It also was a rusted and dull silver color and I totally changed it playing chemist. After many hours of trial and error....I declared it done! I am very happy with the end result.

The signatures are made with paper and have other scraps of batiks, lace, crochet doilies, ribbons intertwined with tags, rubber stamp images and quotes added. I prepared a total of four signatures, however, how many actually get sewn into the book remains to be decided. The first two signatures have grown immensely fat so the book may end with three...and that's okay too. I'll post photos of a few of my favorite pages later.

Project Pronounced Complete #8

One of our exchanges this year in our art group was "mail art". I received from Susan a great piece that folded out into a mini-book that she named "stream of consciousness".  I absolutely loved her idea and how she put it together.  I decided to make something similar with a few changes.  I used a medical year book that I had picked up in one of my many dumpster dives and cut the cover to the size I wanted.  I used my own dyed canvas fabric for the spine.  I played the game of using only what I had in my shoebox of miscellaneous images.  I used rubber stamps to add quotes or images but only those that were presently on my work table.  And the last thing was using the verbiage I had previously cut out from books/magazines that I use for ATC's.  Instead I added them and in my own way, it was my stream of consciousness.


Project Pronounced Complete #7

Tall Sally was the title of the book in one of my book binding books. It is tall and narrow with envelope inserts sewn in the middle of each signature. The placement of the holes in the spine was something new to learn for me. The whole book was a delicious challenge. I began this book with the idea to send it in for submission with all the time and effort it was going to take be to completed. Yikes...the move, new business, and no art studio for a year put this plan on hold.

After I took the book out of the "to be completed" box, I was no longer interested in what I had started.  I no longer liked the cover that I had originally made.  The first thing I did was remake the front cover by salvaging the embellishments I wants to reuse.  My art style had changed during the time span when I had first started this project.  I just had to close my eyes to the first four signatures that I made and move on.....and that is exactly what I did.

Front Cover
Spine
Back Cover
Signatures
You can see the envelopes
One of my favorite page layouts.
I kept my artwork simple.
I did more rubber stamping than collage.
This is where the previous signatures were completed and I started the new signature with NYC.  I went from doing a lot of collage to a very simple format.

Project Pronounced Complete #6

This tiny book (encyclopedia) would be a great altered book, or so I thought. The red covers were in great shape and it was the perfect color for an Alice in Wonderland book. However, the pages were so brittle that after removing most of them, what was left could not be glued together. The paper kept tearing in the smallest of small sizes! My only solution was to add paper to the group of pages and anchor the group of pages by sewing and/or eyelets. What started out as a great project grew to be a big headache. So this little project was placed, no thrown into a box to deal with later. And later turned into a great length of time. As the story goes, I pulled out the book with renewed energy and completed the pages in record time. The last trick was to use all dry adhesive. I have a few more of these books and I am going to completely remove all the pages and insert my own signatures since the covers are in great shape. My favorite thing I did on this book was to add the tiny tea cups as shown.

Project Pronounced Complete #5

My art group for one year had an exchange of different book structures. I made a piano hinge book for Judi and it was posted on my blog. I enjoyed that process so much that I wanted to make one for myself. I got as far as making the signature pages, picking out the chop sticks for the spine and the beads. This was all placed in a plastic bag and was part of my unfinished projects for a few years. I was going to do a different theme than I had done for Judi but with the use of the chop sticks, it occurred to me it would be best to stay with the Asian theme. All the pages are different than what I had made for Judi even though I used some of the same rubber stamp images and embellishments. I did choose a smaller size book and machine stitched when I could instead of using adhesive. I only took photos of a couple of pages.


Project Pronounced Complete #4

The shell was originally glued to another project I was working on and I didn't like the placement. I was able to separate the shell from the project, but I could not get all the glue removed from the shell. It was such a pretty shell and I did not want to discard it. It sat around in my studio for months and months. Then I got an idea to use it as a topper for a jar. It was easy to add glitter to the shell and the glue residue held the glitter in place. What was unexpected was the great color combination. That is something you can guess will be great but until the it comes together, you are uncertain about the end result. I also added thick embossing powder to the top and sides of the lid. I thought about other materials that I could add to the sides of the lid, however, it is a jar I use frequently. Ribbon attachment didn't seem too practical. I am still in thought about what else I can do.


Present from Sara

My sister had an October birthday this week and I had promised to make her a book.  She was probably thinking a "blank" book for journaling. I was thinking of one to hold family memories and that "surprise" will be waiting for her next year!

While going through a storage box in the attic for very specific ephemera, I came across a box that I had painted with Gretchen Cagle when I lived in Oklahoma. I surprised myself by finding this box because I had either sold, given away, or donated all my tole painting projects!  Once the box was spotted (even though I had good intentions of making a special book for my sister) my entire focus changed.
You know when you have given a "gift" to someone when everything seems to fall into place seamlessly. The color and design of the box was the perfect match for her bedroom and she will be using the box on her dresser.  She absolutely loved it and it's a treasure for her.  It's an awesome trade of some very good vibes!

Now, I want to write a bit about Gretchen.  She was without a doubt the most influential teacher I have ever had in my life!!! It's better late than never as I was in my 40's.  Her mantra was "I will teach you art principals and you can take this information and apply it to any medium".  So very true - as I am now a mixed-media artist and I have taken what she has taught me and applied it to my paper arts and beyond.  A big shout-out to Gretchen - Thank you!!!


Project Pronounced Complete #3

This particular altered book is eons old and it was only half done! I have made numerous altered books - most have been given away or sold. This one was started for me to keep and I wanted to showcase all the different techniques that I had learned. What was my huge hurdle that I couldn't seem to jump over was that the book did not have a theme. Yikes....won't do that again. It took something to ignore that and focus on techniques instead. Once I got started, it only took a couple of days to complete this book. In finishing the project, I have two great ideas for my next books - yes, after all my other projects are completed. I am motivated to hurry and get them done so I can move onto new things! I only took photos of one layout this time.


Project Pronounced Complete #2

I was lucky to have been a part of a "round-robin" with three other calligraphy friends....very talented lettering artists!  We all purchased journals about the same size and made our trades once a month.  It was usually at our Monday night calligraphy guild meetings.  We all agreed that our journals were not to be serious and there should be lots of unexpected play involved.  It was about expression and learning and not about the "end product".  We also wanted our journals to be a meld of everyone's art and that was accomplished by having each player add to a page or not - add to a quote or not - add an embellishment or not - rubber stamp or not, etc.  We did not sign any specific thing we did - it was truly a collaborative on each page.  Each page was a part of all of us. I think this particular project was one of my most all-time favorite round robins.

The year went by way too fast and at the end of the year and I was getting ready for a move from Oklahoma to Minnesota.  A month before I moved, we all met for lunch, brought our journals along and shared our thoughts and processes of our contributions.  We asked "who did that part?" and laughed when we couldn't remember who did what exactly!

In my book, there were three pages that "needed" something added to it.  I thought I would do the pages right away.  But then, the book settled in my bookcase unfinished.  In my new found determination to complete all my incomplete projects - I pulled this book from the shelf and completed it!  And once I decided to complete it - it only took a short amount of time!  I enjoyed the process and I look forward to another collaboration!
 My calligraphy friend, mailed me a thank you and of course, I saved it.  It is what calligraphers do - we save all our decorated correspondence!
 Inside the covers, we all wrote the players names, greetings and any requests.
 I started the "Table of Contents" and it wasn't long before some other embellishments were added.  Truly, there was so much freedom in adding whatever you wanted.
Our guild had hosted Doug Boyd and the next two pages were inspired from his weekend class. Someone added beautiful flourishes - I love it!
I love the watercolor rose! I lettered this page using color pencils.
 I was the only serious rubber stamper in the group. I was the one that added those elements to our journals.  
 This page is awesome!
 I found myself completing the left side pages of the journals. The other three participants were very experienced lettering artists and were so very gracious to accept my lettering art without hesitation.  They were in love with what I could do with my rubber stamps to enhance a page!  It was a good marriage among friends.
Quotes written on tags for the pocket.
Wonderful playful letters and fun colors.
 Our guild hosted Lisa Engelbrecht for a weekend retreat workshop.  I was the workshop chairperson and the beautiful envelope and card was a thank you note from Lisa.  I added the "E" to the envelope.  The page on the right inspired me to continue the alphabet and Lisa's note was perfect!
 Lisa's handmade envelope and card.
 The lettering was done on fabric and a ribbon completes a quilt look. 
 I added a piece of "shaving cream" paper that I made - really like this technique for making marble backgrounds.
I really like this page.
I added the marble paper and rubber stamp image.
Again, the rubber stamp image was added by me.
It is amazing how a little paint spray can make a great background.
Do you see the angel image?
Transparency anchored with tiny punched flowers.
I really like the window element. 
  I really liked how over the next several months, these pages were continued to be altered.
Someone added a frame after the artwork was completed.
I took this photo while in Ireland and thought it would work well with the quote I did on the opposite page.
(Rosey Kelly inspired lettering) I did the embossing only to find out later it was backwards. I cut the paper, reversed it and sewed it back onto the page.  What was very cool about it is that everyone thought this was planned. Really, in art, there are no mistakes!
This is a photo of my husband's family shortly after arriving in America from Ireland.
I made this letter in Carl Rohr's workshop. It was in my stash of "what to do with it" stuff until it found a home in my journal.
The dyed fabric was in my stash that I made months earlier. I chose this piece specifically because I wanted a dark background for my white gel pen. It wasn't until later that I realized that the stencil and white area left on the fabric worked so well with the work "dream".
I added the wrapping paper design and wrapped it completely around the page.  
This is a beautifully lettered "h"!
I really like how this page turned out.
Zentangle is so much fun to do.
This is a fun lettering style!
Really like this page.
A piece of papyrus paper was added by another player.  I lettered Egypt and added the stamped images.
I started Zentangle and it wasn't long and everyone else added additional designs and the fabric piece.
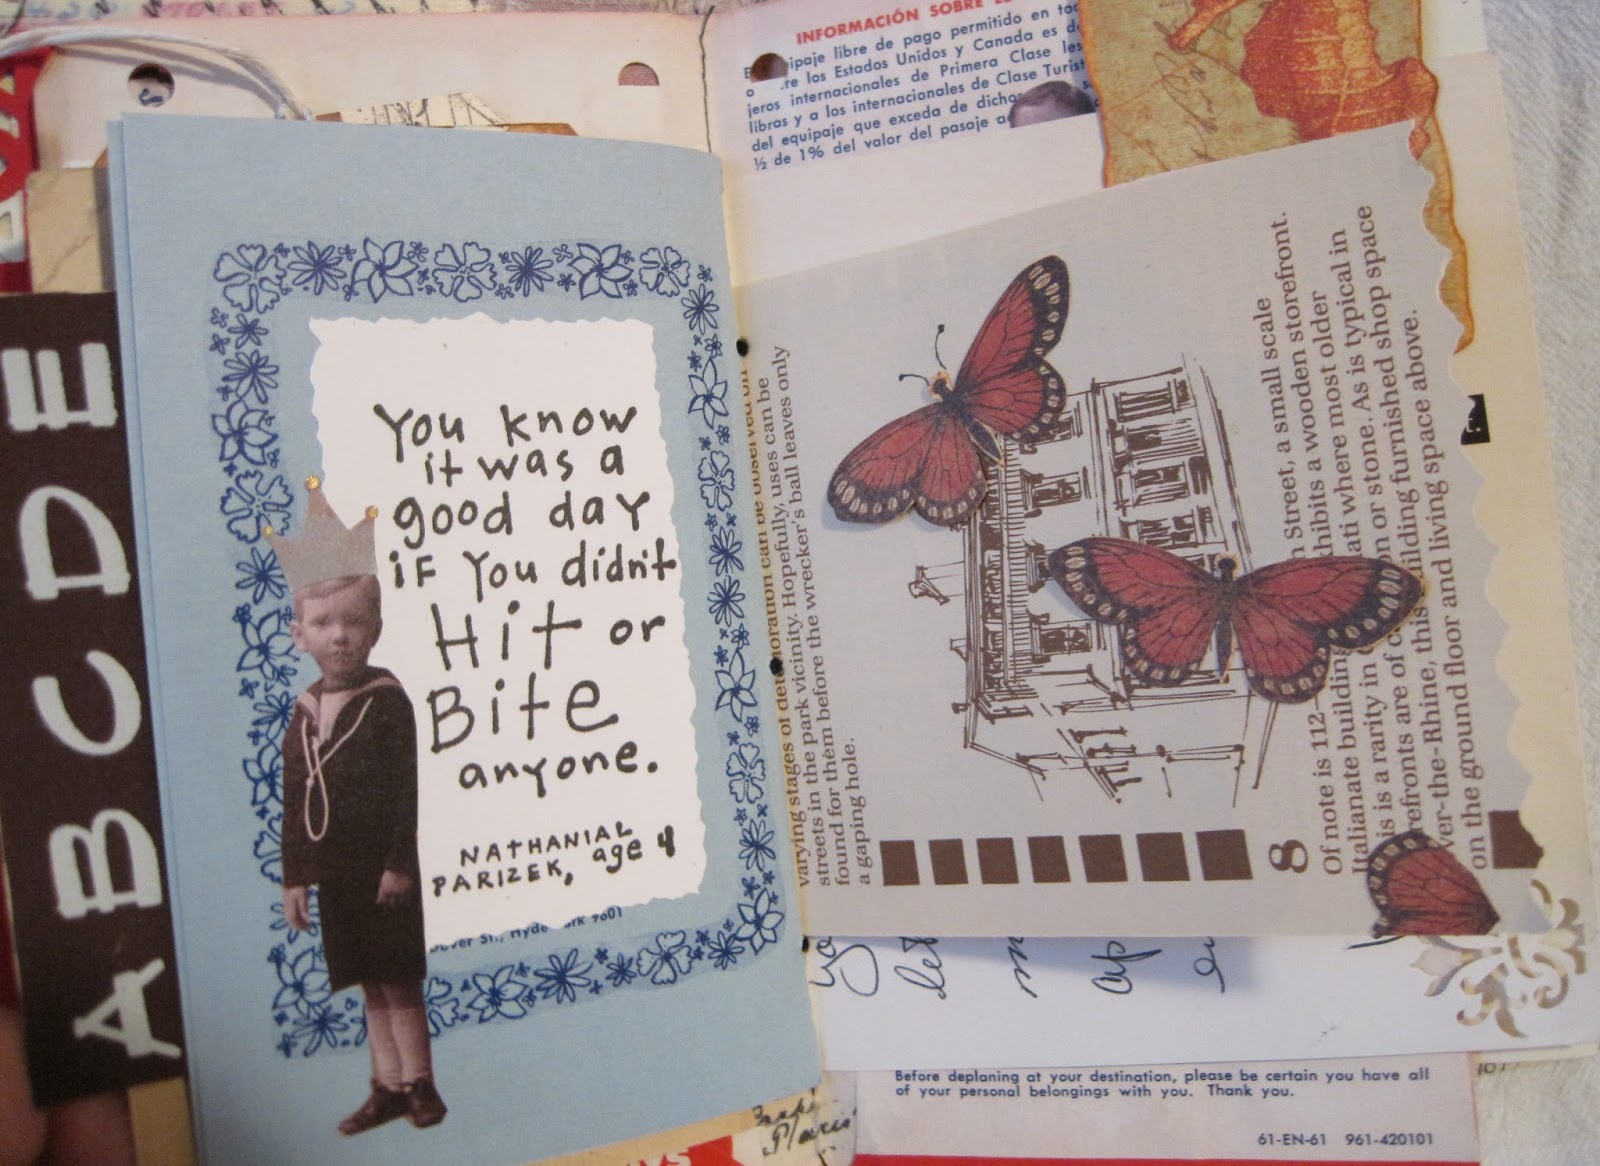
A spinner was added to hold the booklet closed. (the photo is when I was five years old.)
I really like this fold-out booklet!
Great page!
This page is so much fun!
Fabric and lettering.
Watercolor and lettering.
Thanks Janie Farr for inspiring me for this page - totally fun to do!
Love this page!
All kinds of papers and textures.
Postage stamp scrap turned into a great frame for lettering.
Napkin collage.
Tiny folder added and "art" was sewn on the page.
Inside folder.
Fun letters.
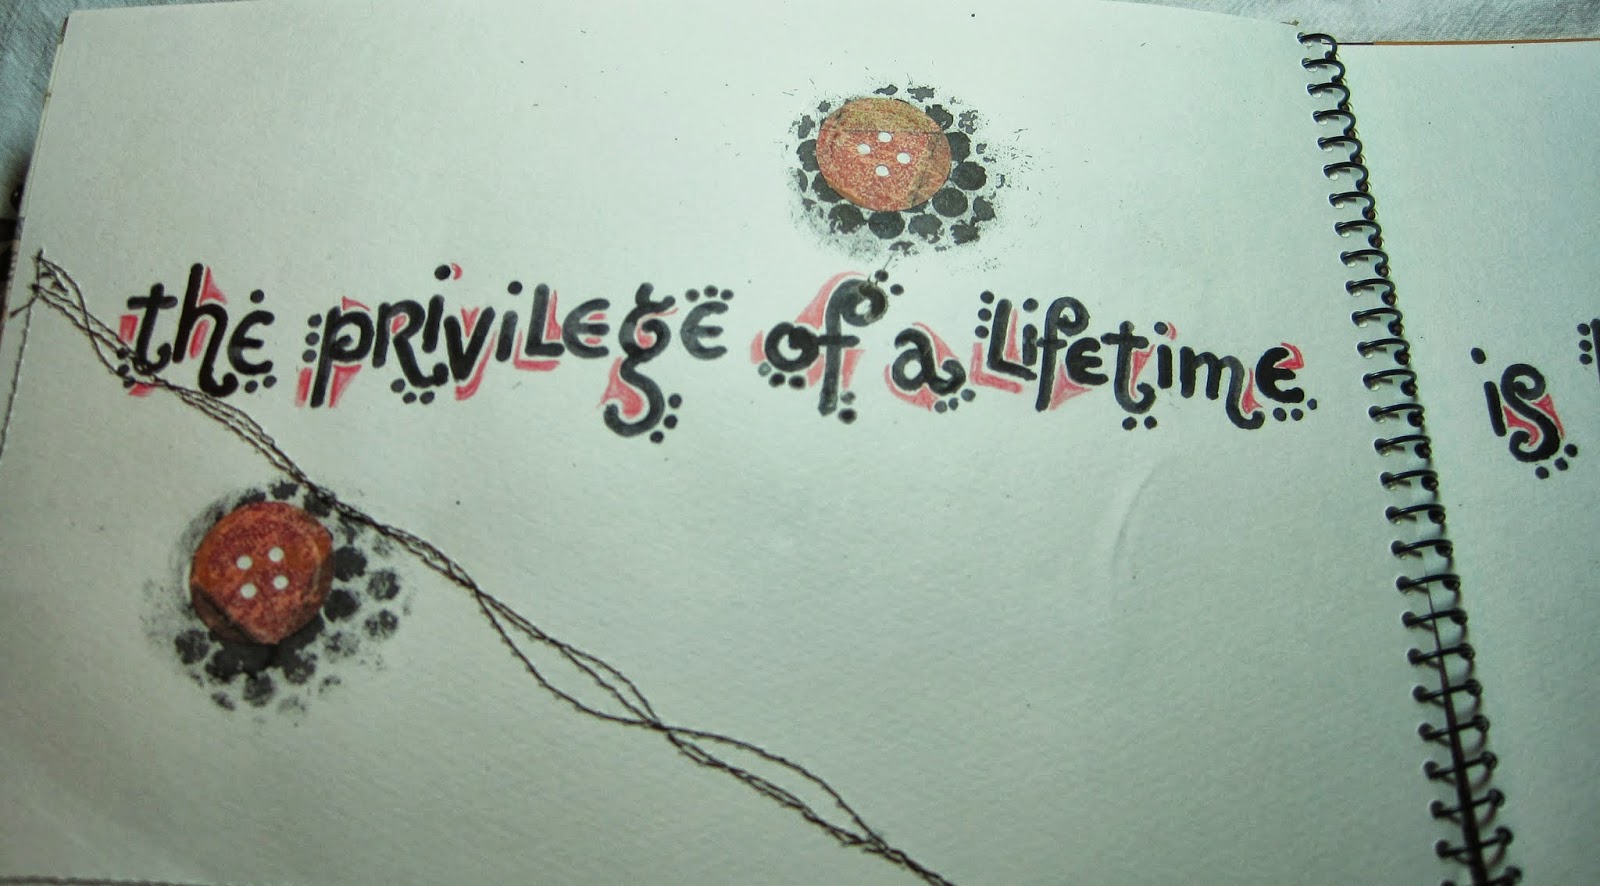
Really like this quote.
Vintage wedding photo.
Sadly, the last page!

Yeah, project completed.  Two down, more to come!